Preliminary :
- This method uses 7zip as extraction software. Using another extraction software (like winrar, winzip, ...), and this procedure could be slightly different
- File icons may also be slightly different
- Windows Explorer is configured with : "Big Icons" and "File extension visible"
- French language is used in all screenshots, but all instructions are in English
- OK, ready ... so let's GO !
2) Download the "waves" theme in your computer
3) Open Windows Explorer and go to the folder in which you downloaded the file named "waves" (or "waves.wr8")
4) Right click on the file "waves" to extract it using 7-zip context menu option : Extract to "waves\"
4) You have a new folder created named : waves
5) Open the new folder named "waves" to see all files
- Boot.bmp : Setup background --> Format : bmp ; Size : 1024x768
- Bootw.bmp : Setup window replacement --> Format : bmp ; Size : 672x512 (check provided file properties)
- Lockscreen.jpg : Windows 8.0, 8.1 and 10 lockscreen picture (not necessary for Windows 7) --> Format : jpg ; Size : no restrictions
- Logo.bmp : System Control Panel Logo --> Format : jpg ; Size : no restrictions (not too big though)
- Preview.jpg : WinReducer thumbnails displayed when you load a WinReducer Themes for Windows --> Format : jpg ; Size : 895x300
- Readme.txt : Information about all resources you used in your theme --> Add your own information
- Theme.theme : Theme file which loads all other resources in Windows during startup to apply your theme. You could open it with Notepad.
- Wallpaper.jpg : Windows desktop wallpaper -> Format : jpg ; Size : no restrictions
6) You could have a look in the "Cursors" folder
==> To add your files : just rename them with the exact same names as in the "waves cursors" folder and replace or delete the files do not need
7) Once you customized the "waves" theme folder with your own files, select with your mouse all files like this
7) Right click the files selection to create your zip compressed archive using 7-zip context menu option : Extract to "Add to waves.zip"
8) You will see a new file named "waves.zip"
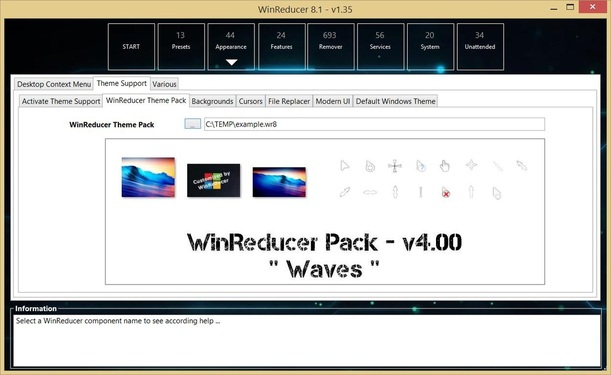
9) Rename "waves.zip" with the name of your desired name "example.wr8" ("*.wr8" extension is the important thing otherwise it won't work in WinReducer)
10) Congratulations ! You could use your first WinReducer Theme for Windows in WinReducer 10.0, 8.1, 8.0 or 7.0 ...
11) If you want to share your beautiful creations, you could share them in the Forum by following this link :
Updated : 07 Jan. 2015


