WINREDUCER.NET
  • Software
    • EX-100
    • EX-81
    • EX-80
    • EX-70
    • File Validator
    • Logo Changer
    • Wim Converter
    • Wlan B&R
  • Resources
    • Forum
    • Languages
    • Screenshots
    • Themes (GUI)
    • Themes (Windows)
    • Tutorials
    • WCCF
  • Support
    • Contact
    • FAQ
    • Information
    • VIP Members
  • Store
    • Products
    • Compare
    • Instructions

Explore the REMOVER tab

Preliminary :
  • This tutorial is based on WinReducer EX-100 (some options may differ or not available for other WinReducer EX-Series Software)
  • You've already installed WinReducer EX-100
  • WinReducer EX-100 is correctly installed and properly configured
  • ​OK, ready ... so let's GO !

1) Launch WinReducer EX-100 from your installation folder

2) Mount your Windows Edition using this tutorial : Mount your Windows Edition

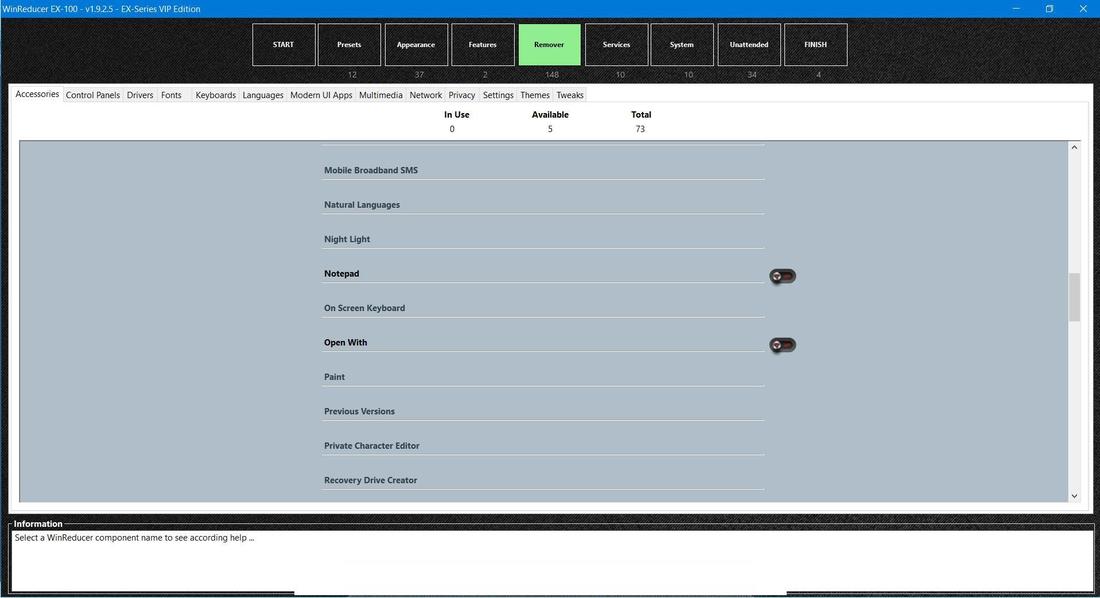
3) You will then see the Main configuration window, and choose the "REMOVER" tab
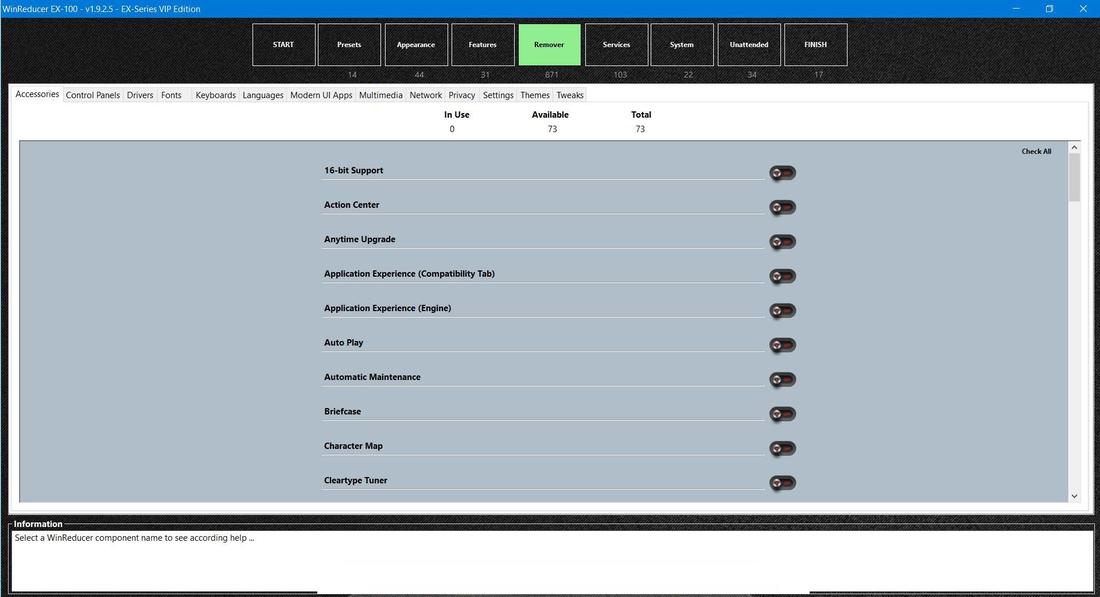
Picture
Picture n°1
  • You will see the new "REMOVER" tab :
  • Each Categories are separated in dedicated tabs : "Accessories", "Control Panels", "Drivers", ...
  • Each tabs have components count (on top of each Category tabs) :
  1. ​​"In Use" : those you are selecting to remove or configure
  2. "Available" : all available components, which are not already removed
  3. "Total" : Total number of components in this Category
  • ​​Each tabs have an option to :
  1. ​"Check All" : Select all components in the Category in one click (then automatically changed to "Uncheck All" status) 
  2. "Uncheck All" : Deselect all components in the Category in one click (then automatically changed to "Check All" status)
  • ​Each Tabs have the entire list of components in the Category (center of each Category tabs)  :
  1. List of components ("16 Bits Support", "Action Center", ...)
  2. Selection button ("ON"/"OFF") for each components

4) Several components navigation possibilities : "Keyboards", "Mouse" or "Touch Screen" !
Picture
Picture n°2
Picture
Picture n°3

"​KEYBOARDS"
  • ​Click on "REMOVER" tab icon (top window menu) : Automatically select the previous used components tab ("Accessories", "Control Panels", "Drivers", ...) ... then use the "Down" arrow  keyboard key to select the first component selection button and you may read, below, which keyboard keys to  easily navigate between all available components 
  • Once the first component is selected, all shortcuts keyboard keys are activated for an easy navigation :
  1. ​"Down" arrow : select the next available component
  2. "Up"  arrow : select the previous available component
  3. "0" (number: zero) or "Space" : Change the selection button status to "ON" or "OFF"
  4. "1" (number: one) : Move to previous tab category
  5. "2" ("number: two) : Move to next tab category
  • Move to a selection button ("ON"/"OFF"): Displays an "Help Tips"(1) on the bottom of the tab (Picture n°2)
  • Move to a selection button ("ON"/"OFF"): The according component appears in white color for better visibility (Picture n°2)
  • Activate a selection button ("ON"/"OFF") : The according component appears in green color for a better visibility (Picture n°3) ... it informs you that you selected this component
"MOUSE"
  • ​Move your mouse cursor to a component name : Displays an "Help Tips"(1) on the bottom of the tab (Picture n°2)
  • Move your mouse cursor to a selection button ("ON"/"OFF"): Displays an "Help Tips"(1) on the bottom of the tab (Picture n°2)
  • Move your mouse cursor to a selection button ("ON"/"OFF"): The according component appears in white color for better visibility (Picture n°2)
  • Click on a selection button ("ON"/"OFF") : The according component appears in green color for a better visibility (Picture n°3) ... it informs you that you selected this component
"​TOUCH SCREEN"
  • ​Move your finger to a component name : Displays an "Help Tips"(1) on the bottom of the tab (Picture n°2)
  • Move your finger to a selection button ("ON"/"OFF"): Displays an "Help Tips"(1) on the bottom of the tab (Picture n°2)
  • Move your finger to a selection button ("ON"/"OFF"): The according component appears in white color for better visibility (Picture n°2)
  • Activate a selection button ("ON"/"OFF") : The according component appears in green color for a better visibility (Picture n°3) ... it informs you that you selected this component
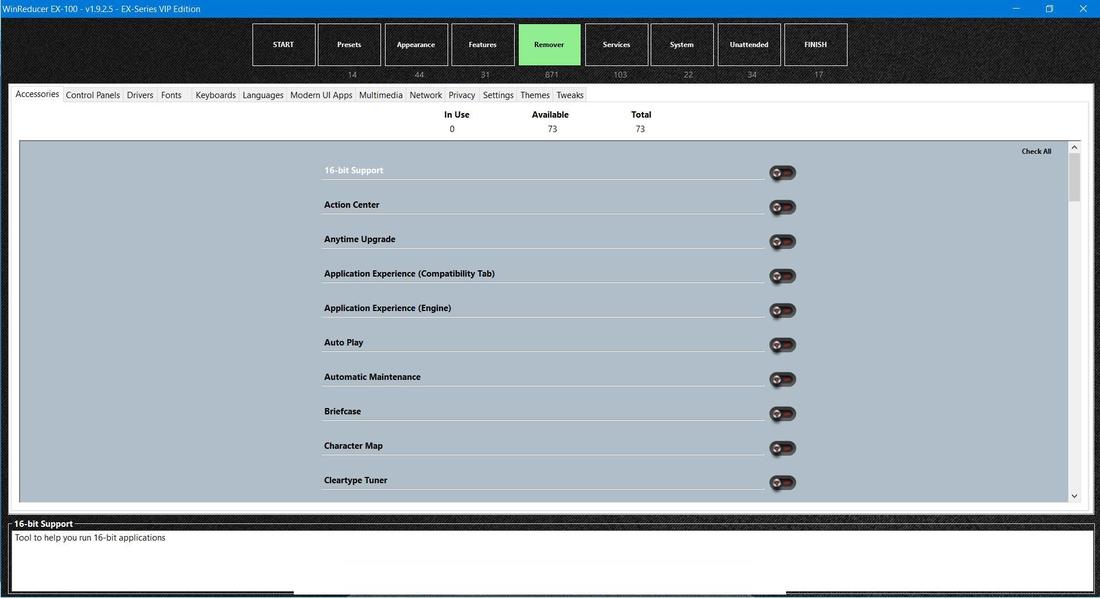
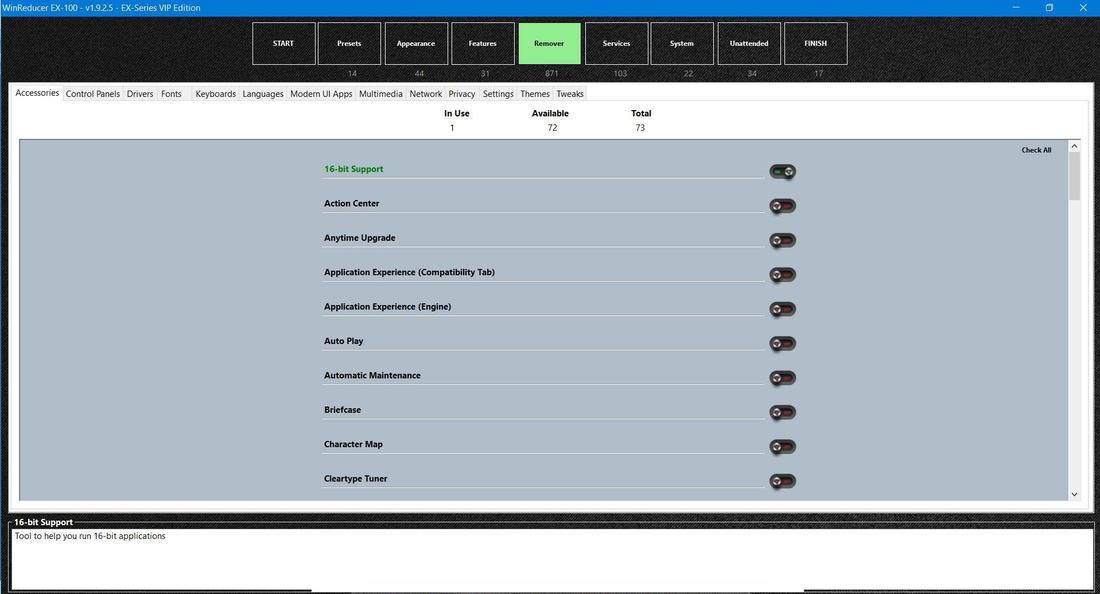
  • (1) An "Help Tips" displays recommendations and various information about the selected component, to help you decide if you need to remove or not remove this component

5) All selection buttons have disappeared ... why ?
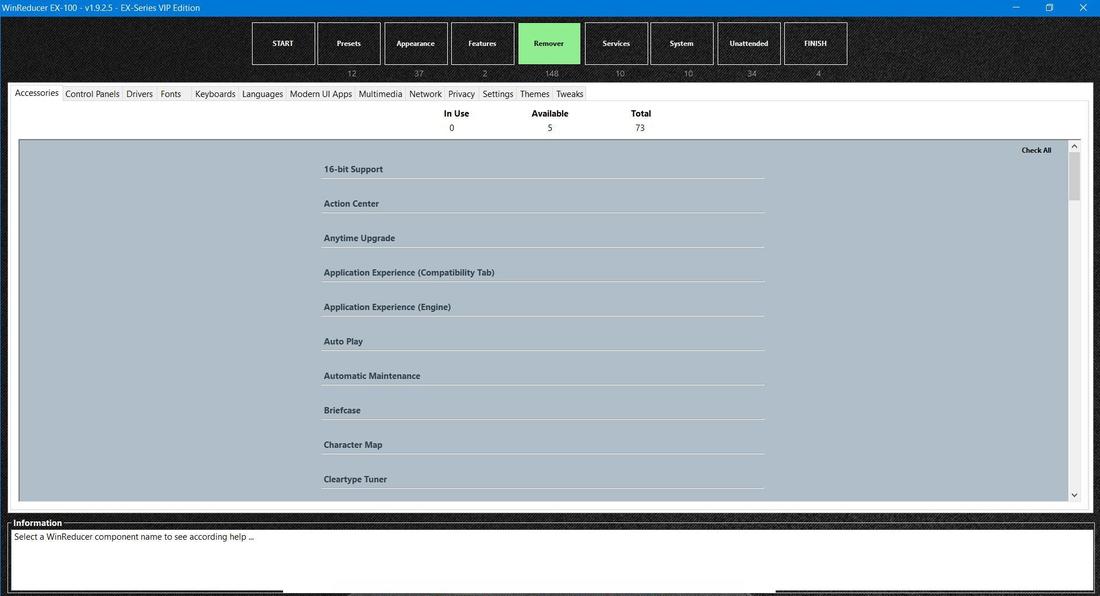
Picture
Picture n°4
Picture
Picture n°5
  • It seems that no selection buttons are available (Picture n°4), there is possibly two reasons for this :
  1. ​​You already removed all components, so no more components are available
  2. Check the "Available" components count number (top of the tab) to check if there are still components which are not already removed. For example in Figure n°4, five components are available ... so just go to the available component  in the components tab list

6) Thank you very much for your interest in the WinReducer Project :)

Updated : 04 November 2017
Credits
7-Zip
GetWaikTools

Paulo Neto
Resource Hacker

SetACL
Partners
Station-Drivers
winclub.pl
WinReducer Project
Contact
Facebook Page
Information

WinReducer Website v9.0.0.0
Designed by winterstorm2050 (2020)
  • Software
    • EX-100
    • EX-81
    • EX-80
    • EX-70
    • File Validator
    • Logo Changer
    • Wim Converter
    • Wlan B&R
  • Resources
    • Forum
    • Languages
    • Screenshots
    • Themes (GUI)
    • Themes (Windows)
    • Tutorials
    • WCCF
  • Support
    • Contact
    • FAQ
    • Information
    • VIP Members
  • Store
    • Products
    • Compare
    • Instructions