Preliminary :
- This tutorial is based on WinReducer EX-100 (some options may differ or not available for other WinReducer EX-Series Software)
- You've already installed WinReducer EX-100
- WinReducer EX-100 is correctly installed and properly configured
- You have downloaded all Windows Updates using WinReducer EX-Series software using this tutorial : Download all Windows Updates
- OK, ready ... so let's GO !
1) Launch WinReducer EX-100 from your installation folder
2) Mount your Windows Edition using this tutorial : Mount your Windows Edition
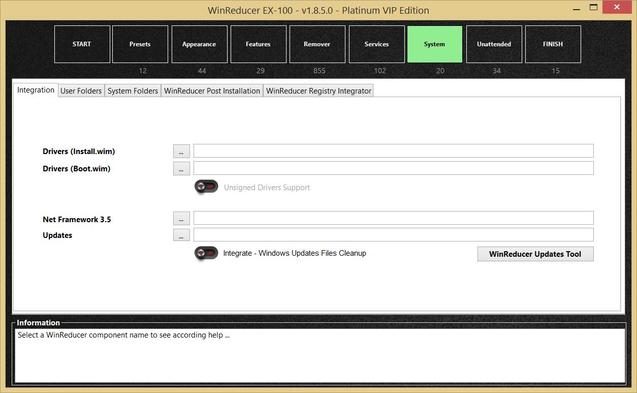
3) You will then see the Main configuration window, and choose the "System" tab
- You need to define the folder, which contains all the Updates you downloaded :
- If you use the "WinReducer Updates Downloader" tool : just hit the "..." button of the "Updates" option, and immediately hit the "OK" button ... the correct folder path will be automatically selected and displayed in the according field
- if you downloaded all updates by yourself : hit the "..." button of the "Updates" option, and point to the folder you use to store all updates (take care to use the correct folder structure otherwise it will not work correctly)
- You may also need to use options available :
- "Integrate - Windows Updates Files Cleanup" : FOR EXPERT ONLY : this reduces your final Windows installation size by more than 50% but you will loose some Windows functionalities you may need. So, use this option when you will have enough experience with all other "Optimizations" options (available in the "FINISH" tab)
- "Windows Update Tool" : this is a shortcut to the "WinReducer Updates Downloader" tool, in case you want to check if a new "WinReducer Updates Catalog" is available, before you will integrate all Windows Updates in order to be sure to have all latest Updates
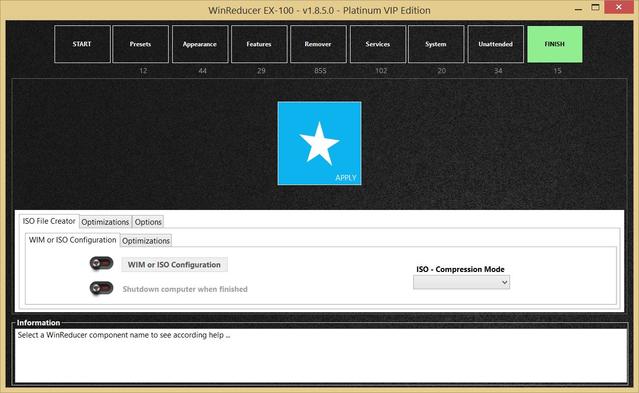
4) Then go to the "FINISH" tab
- Hit the "APPLY" button to directly integrate all your updates in your Windows Edition
Updated : 31 May 2017

